




CV32
Staff Pukes
-
Joined
Everything posted by CV32
-
Yeah, it does depend on the figures used in the database that governs the scenario, obviously. I was referring to the real life or best known figures that the most current database strives to emulate. (Btw, when I look at the GIUK values, I see a value of 8.0 nm for both the Sea Skua and the SA-N-4 Gecko).
-
Nah. Not suicidal, but certainly challenging. Sea Skua outranges SA-N-4 Gecko, so just take care to stand off outside Gecko range. The usual obstacle is having enough Sea Skuas to beat both Gecko and the Nanuchka's gun armament.
-
For me, it very much depends. Keep in mind that, in HCE, when you combine multiple aircraft types in a 'group', the group always travels at the speed of the slowest aircraft. For many of the jet engine tankers, this may not be a huge deal as they can probably come close to fast jet cruise performance at higher altitudes. For strike missions, if the 'tanker' is simply a fast jet capable of buddy-buddy refueling, and moreover, of the same type (or of similar cruise speed capability), then that tanker is probably going into hostile airspace along with my strikers. But if the tanker is a dedicated tanker/transport type, like the venerable KC-135 for example, then I usually set up rendezvous points outside of hostile airspace (or in a less hostile part of it) where a strike package can link up the tanker, get gas and then proceed on to the objective. For ferry or long range patrol missions, I might just tag the tanker along with the rest of the group for convenience sake.
-
A new version of the official Harpoon Commander's Edition (HCE) Database (HCDB-110304) is now available. Get the new DB in the Downloads section. New additions (or overhauls of existing entries) include: Aircraft: MiG-25PD Foxbat E - Libya Mirage F1AD - Libya Su-22 Fitter F - Libya Su-22M Fitter J - Libya Su-24M2 Fencer D - Russia Tu-22B Blinder A - Libya Installations: Sirte - Libya Ships: C107 LCU - Libya Ibn Ouf LST - Libya Nanuchka II (1234E/LY) PTM - Libya Natya I (266M1/LY) MCM - Libya Natya I (266M2/LY) MCM - Libya Osa II (205EM/LY) PTM - Libya Enjoy.
-
File Name: Antaeus File Submitter: CV32 File Submitted: 4 Mar 2011 File Updated: 4 Mar 2011 File Category: MEDC DB Used: HCDB-110304 Authors: Brad Leyte Battleset-MEDC: .sco - EC2003 - EC2003 Antaeus A Harpoon Commander's Edition scenario for the EC2003 MEDC battleset. This scenario is designed for play by the BLUE side only. Having become engulfed in the protests and demonstrations cascading across Middle Eastern nations, Libya is now in full revolt. Benghazi has fallen to, some might say been liberated by, the anti-government movement which is sweeping west toward Tripoli. Colonel Muammar Gaddafi, leader of this North African country for more than 40 years, refuses to leave power and is instead tightening his grip. Although many have abandoned the regime, a considerable number of forces still loyal to Gaddafi have been conducting arrests, abductions, and killings to try and stop the tides of change. It is reported that Gaddafi is promising wealth and position to local officials, political leaders and armed forces commanders in an effort to guarantee their support and obedience. With the military now taking an active role in suppressing the rebels, launching air strikes and ground attacks, the country is slipping rapidly into civil war. Click here to download this file
-
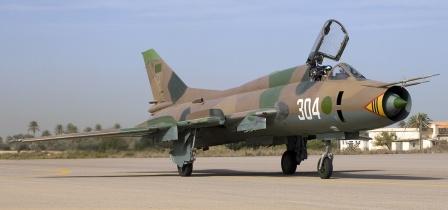 Antaeus A Harpoon Commander's Edition scenario for the EC2003 MEDC battleset. This scenario is designed for play by the BLUE side only. Having become engulfed in the protests and demonstrations cascading across Middle Eastern nations, Libya is now in full revolt. Benghazi has fallen to, some might say been liberated by, the anti-government movement which is sweeping west toward Tripoli. Colonel Muammar Gaddafi, leader of this North African country for more than 40 years, refuses to leave power and is instead tightening his grip. Although many have abandoned the regime, a considerable number of forces still loyal to Gaddafi have been conducting arrests, abductions, and killings to try and stop the tides of change. It is reported that Gaddafi is promising wealth and position to local officials, political leaders and armed forces commanders in an effort to guarantee their support and obedience. With the military now taking an active role in suppressing the rebels, launching air strikes and ground attacks, the country is slipping rapidly into civil war.
 -
From Aviation Week [excerpt]
-
From Ares [excerpt]
-
From Aviation Week [excerpt] CV32: Wow.
-
A new version of the Harpoon Commander's Edition (HCE) 'Cold War' Database (HCCW-110304) is now available. Get it in the Downloads section of the HarpGamer website. New additions include: Aircraft: F-4N Phantom II - USA P-3A Orion (62) - USA P-3A Orion (66) - USA P-3A Orion (70) - USA P-3B Orion (65) - USA P-3B Orion (66) - USA P-3B Orion (70) - USA P-3C Orion (69) - USA P-3C Orion (70) - USA P-3C Update I - USA Ships: Andrea Doria CHG - Italy Vittorio Veneto CHG - Italy Submarines: Enrico Toti (1968) SS - Italy Enrico Toti (1974) SS - Italy Grayback (1958) SSG - USA Grayback (1967) LPSS - USA Jack (Permit/67) SSN - USA Nautilus (1955) SSN - USA Nautilus (1960) SSN - USA Permit (1/61) SSN - USA Permit (1/64) SSN - USA Permit (1/73) SSN - USA Permit (2/66) SSN - USA Permit (2/73) SSN - USA Piomarta (Tang/IT) SS - Italy Priaroggia (Tench) SS - Italy Romei (Tang/IT) SS - Italy Seawolf (1957) SSN - USA Seawolf (1967) SSN - USA Skate (1957) SSN - USA Skate (1960) SSN - USA Skate (1973) SSN - USA Skipjack (1959) SSN - USA Skipjack (1961) SSN - USA Sturgeon (LH1/72) SSN - USA Sturgeon (LH1/73) SSN - USA Sturgeon (LH2/73) SSN - USA Sturgeon (SH/67) SSN - USA Sturgeon (SH/72) SSN - USA Sturgeon (SH/73) SSN - USA Tang (1/1951) SS - USA Tang (1/1952) SS - USA Toricelli (Balao) SS - Italy Triton SSRN - USA Tullibee (1960) SSN - USA Tullibee (1962) SSN - USA Tullibee (1973) SSN - USA Enjoy.
-
I'd offer my vote of support for the HUD3 database. IMHO, Darren really cares about the game, has a longstanding connection with it, and a strong knowledge of both the game mechanics and the platforms that make a database what it is.
-
From DefenseNews [excerpt] CV32: I think I heard a collective sigh of relief.
-
From DefenseNews [excerpt]
-
CV32: Kovalyov last week, Simonov this week ... From RIA Novosti [excerpt]
-
An important point, as a narrow bearing and small uncertainty zone will be of no use to you if it lies between the target and another unit (the detecting unit), and not between the target and your shooter. (Maybe I do need to produce another set of screenshots, as this is a bit cumbersome to describe in words).
-
You can take some comfort in the fact that the feature is fairly new, or at least, has evolved somewhat in HCE. Okay, I kinda wondered that myself, but figured I might as well go ahead and eliminate it as a potential issue. You are describing a somewhat different situation where you have detected a target, but it lies in an uncertainty zone, and you have weapons that are 'theoretically' capable of seeking out and trying to find that target on their own. Without going into a great amount of detail (yet), the bearing to the target and the size of the yellow uncertainty zone are of paramount importance here. If you have don't have a narrow bearing range and/or if the uncertainty zone is large, your chances of your weapon detecting and attacking the target (or the correct target) are significantly reduced. To optimize your chances, what you're looking for, ideally, are a very narrow range of potential bearings to the target (just a few degrees at most) and an uncertainty zone that looks more like a fine line than a fat polygon.
-
-
-
It doesn't affect hit probabilities or detection probabilities in the sense you probably mean, but obviously, speeding up the clock does make things happen more quickly. Since many sensor sweeps only happen periodically (e.g. sonar once every five minutes), speeding up the clock is going to increase the number of sweeps that happen in real time (your time).
-
Alrighty, here we go. A little tutorial in bearing only launch (BOL) attacks. This will be from the SSM side of the coin, as this was easiest to whip up without building a test scenario, but the principle is the same, and I can provide one that depicts an ASM attack in due course if necessary. Borrowing this time from your favorite scenario , 'Middleweights', for Westpac. At game start I am in control of BLUE ship group AOS, a trio of Japanese Maritime Self Defense Force (JMSDF) Hayabusa class missile armed patrol craft. Here's a pic: They are patrolling northward in the East China Sea, just southwest of Nagasaki. A friendly aircraft to the east soon gets a sniff of a surface ship contact to the north. Now, ordinarily, we would probably try and confirm the identity of this contact before taking any offensive action. But, to speed up things, I used the 'reveal all' keystroke to identify the contact as a closely knit group of four South Korean Sea Dolphin class gunboats. Here's a pic: I soon have a solid fix (via the aircraft's ESM) on some but not all of the enemy gunboats. I could engage normally here but instead choose to attack via a bearing only launch (BOL) with the Hayabusa's active radar guided Type 88/90 (SSM-1) surface to surface anti-ship missiles. The range to target is roughly 75 nm, while maximum range of the SSM-1 is 81 nm. We're good to go. I choose the BOL attack method by pressing 'b' on the keyboard. A yellow circle appears on the Group Map showing the maximum engagement range of my available BOL weapons, as well as a pop up window prompting me to select a bearing for attack. (Note as well the Unit Map showing the uncertain position of at least some units of the enemy group). I select the attack bearing by pointing with my mouse and clicking on an appropriate part of the Group Map in cross hair fashion. The selected point will also serve as the activation point for my missile's terminal active radar seeker. It is important here to take into account the speed of your target, its current (or likely) heading, as well as the speed of your missiles. Subsonic missiles like the SSM-1 will have the minimum seeker acquisition range of 5 nm while faster, supersonic missiles (such as many of the Soviet/Russian weapons) will be able to exploit a full 20 nm. Also, a reminder that the seeker acquisition angle is limited to 45 degrees, so any target falling outside that cone will likely escape attack. If the target is distant, traveling at high speed, and your missiles are subsonic, you run the risk of the target reaching - and passing - your missiles' activation point before the missiles actually get there. If that happens, the seeker will probably see nothing but empty ocean when it finally enables. On the other hand, if you set your activation point too early, you run the chance of your missile locking onto and attacking some other contact, possibly even a friendly or neutral if the sea is crowded. (Accidentally sinking a friendly warship or a fishing boat tends to have detrimental effects on one's career path). Once I have chosen a bearing and activation point by clicking on the map, I will get the weapons allocation pop up window. I know I have four potential targets, and plenty of missiles, but to conserve firepower, I assign a total of three SSM-1 missiles, one from each Hayabusa. Since the missiles have no way of selecting individual targets, especially when they are grouped closely, I do not want to shoot a bunch of missiles and have them all homing on a single ship. Moments after launch, I can see that my BLUE missile group AUM is enroute and that they have 37 nm (and 3 minutes 45 seconds) to go before reaching their activation point. Now, that RED air group to the west caused me all kinds of grief during this missile engagement. Turns out it was a flight of F-15K Slam Eagles and they happily splashed my anti-ship missiles. I had to shoot again to repeat the engagement. The next screenshot shows my missiles just 1 nm (and 3 seconds) from reaching their activation point. Fortunately they are still in front of the enemy group and I have a good chance that when the missiles activate, they will pick up the targets and attack. After seeker activation, the missiles continue on their previous course, searching for targets. As earlier stated, their seeker range is just 5 nm, and so promptly at 5 nm (and 30 seconds) from the enemy group, I get confirmation of lock on. Note the phrase in the Unit Map display becomes 'Distance to 1st Target' rather than 'Distance to 1st Activation'. During the resulting terminal engagement, two of my three missiles home on, strike and destroy the South Korean gunboat Kilurki 267, while the third missile locked onto another target. That attack, unfortunately, resulted in a clean miss. Hopefully this helps give you (and others following the thread) some idea of how the BOL attack mechanism in HCE works.
-
You're talking about 'man in the loop' controlled weapons, i.e. munitions that need an operator (typically the WSO) to manually direct the weapon in the terminal phase of its attack. There is no need to keep a radar or other sensor active, but you did need to loiter in the vicinity of the target in order for the weapon to have any chance of scoring a hit. If you RTB after launch or otherwise strayed from the area, the weapons would lose guidance and always miss. This was a problem for the AI, which was RTB after launch. So we removed the 'midcourse guidance' flag from the relevant weapons in the database. The issue is discussed here.
-
Joe, I can probably produce a set of screenshots showing how to carry out an effective BOL missile attack, if you think that would be helpful.
-
Yes, and there are many. Most anti-ship missiles employ active radar guidance, e.g. AGM-84 Harpoon, AM.39 Exocet, Sea Eagle, several flavours of Kh-22 (AS-4 Kitchen), etc, etc. Its a long list.
-
Here are the promised screenshots, again working from your savegame for the Backyard scenario ... Here, with the 'reveal all' (Ctrl Alt S) keystroke working, take a look at Red airfield ZYa (Ussuriysk). No attached units for ZYa visible in the Group Map, as is proper, but when we look at the Unit Map, we can a number of mobile land units (in this case, AAA and SAM units) arrayed around the airfield. Looking at the Group report display in the lower left hand corner, we can also see that 7 units in all are attached, and not only that, but we can count the number of SAM missiles, guns and AA shells available to our enemy. Here, with the Unit Map selected and, more specifically, the most westerly unit attached to the airfield also selected, we can see that it is identified as ZY03 (again, identifying it as a unit of ZYa). The Unit report display gives even more information, that the unit is named 'SAM Site 40', that it has 12 available missiles, an AA gun and 255 AA shells. If we punched the 'Display' button here, we'd even be able to tell what kind of a SAM system it was and its various capabilities. So, Joe, I am not sure what to say other than yes, it clearly works as it is supposed to.
-
Anyone have experience to report with the new torpedo acquisition range model? Personally, I think I have seen a noticeable improvement. Uncertainty zones are still a b*tch, but I am finding that if you have a solid contact and drop close to the target, chance of acquisition is considerably improved.
