




trader
Members
-
Joined
-
Last visited
-
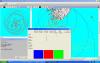
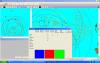
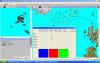
AAR: F-14 Fleet Defender V1.1 Battleset: HCE EC2003 NACV Source: F-14 Fleet Defender V1.1 - Harpgamer Author: Ralf Koelbach Contact: rkoelbach@yahoo.com Date of release: 08-Jan-2008 Date of play: Early-Mid July 2008 Synopsis: Ladies and Gentlemen, After success in V1.0, I set my sights on V1.1, which held the promise of an even greater challenge. I tried several times due to the fact it crashed repeatedly – normally towards the end. At game start time I found my main asset for this scenario - a 2*CV CVBG - about 450NM directly south of Iceland. Again, I had a strong suspicion that there would be Backfires – or at least Badgers – based there, and I sent out 2-ship sections of F-14’s at full military power at high altitude covering the 90 degree arc NW-NE. E-2C’s were sent up to patrol stations around the formation – along with ES-3’s and EA-6B’s - and promptly reported enemy KA-31 AEW Helix helicopters to the NW, NE, and SE based on ESM hits. I also recorded sonar detections close to the force from the ASW units and submarines. Some of these turned out to be merchants, four were AGI’s, two were two-sub wolfpacks, and finally a tattletale Mod Kashin DDG was directly NW of the force. The CVBG was halted in order to reduce detection probability from the subs as aircraft were launched to deal with the enemy. I also sent all carrier capable air assets in Greenland toward the CVBG on a ferry mission. The Heavy Bombers from CONUS were sent with tanker support toward the action. By the time they arrived I would have missions for them, or the weapons loadout would be deemed unsuitable. A quick re-arm in Canada would reduce the mission turn around time by 6-hours – and also deplete the Canadian stocks of advanced PGM’s. Again the enemy CVBG was found to be to the SE as large numbers of confirmed Su-33 Flanker-D’s swarmed around and headed toward my aircraft. Again, F-14’s surged ahead to take the CAP down, which was again achieved without loss. Around a dozen Yak-38 Forger-A’s were splashed in addition to about a dozen Flanker-D’s. This telegraphed that this CVBG was the main enemy force, with one CV and one CVH confirmed based on aircraft type and numbers. Forgers were also detected in smaller numbers to the NE. That group had two CV/CVH like radar returns and again I suspected a Kusnetsov CV decoy. However, there was definitely one CVH in the group – which I will call CVHBG. To the NW was ostensibly another CVBG, but due to the lack of any fixed wing assets, I had doubts. Even as I pushed AEW and EW aircraft close as bait there was no hostile aircraft response. I thus decided that this group was centered on a BCGN or Slava CG – or maybe both – it will be called SAG1 from here on in. With this force composition assessment made, the strike crews were briefed and launched in record time. The RADM was a disciple of Capt. Wayne P. Hughes Jr. USN (Ret.), and his brilliant work “Fleet Tactics and Coastal Combat”. The old man was going to strike effectively first, while holding off the land-based air threat and searching for more subs around the force. Briefly he considered a T-LAM strike against the nearest airfield at Keflavik, Iceland. Without having mapped out the defenses though it could just as easily be a waste of his single bolt of T-LAM’s. Unlike the AGM-84’s he was about to fling at those enemy forces, the T-LAM’s could not be reloaded and replenished at sea. He also had a natural wariness of submariners, and sent his own supporting SSN’s along the bearings to the nearest enemy forces. He wanted them to position ahead of the enemy force and try to detect any supporting subs. He knew the enemy was likely to have SSGN’s inside the formations – a sort-of mobile bastion – protected by the SA-N-6 Grumble and SS-N-12/19 Sandbox/Shipwreck. The submariners were to engage only confirmed SSGN’s and in self defense – until the surface ships were on the bottom, then it would be weapons free. The submarine LO onboard the flagship didn’t like the order he passed to the subs – and the Commanding Officers liked the orders less – but he did his duty. They wanted to paint carrier silhouettes on their bulkheads, but it was not to be. Had the enemy used the point-of-origin of the dozens of aircraft launched by my CVBG – painted immediately after take-off by the now doomed tattletale – as the aimpoint for BOL fired AS-4 Kitchen and SS-N-12/19 Sandbox/Shipwreck, then I may have experienced some problems. As it was, the enemy commander made a similar decision to the Admiral and kept his priceless SSM’s in their launch silos – waiting for a targeting solution. Mod Kashin – Stroynyy died first under a clutch of AGM-84’s, followed by the four Okean AGI’s – Linza, Travers, Zond, and Teodolit. The subs took longer to pin down but the durable Russian SSN’s and SSGN were worn down by barrages of LWT’s from S-3B’s and some helos. Akula I – K-263 Delfin, Victor III – K-251, Victor II – K-517 and Charlie I – K-429 were soon on their final voyage to the bottom of the North Atlantic. Fortunately all the lethal Series 65-76 super-HWT were onboard as they sank to the bottom, along with the SS-N-7 Starbrights from the Charlie I. Also killed were two neutral vsls, the tanker – Sealift Atlantic and super tanker – Regina Maersk. Each was heading toward the CVBG and neither would heed the warnings to turn away. The Admiral knew the risk of compromise from an informant onboard either vessel was too high to risk it. Targeting was difficult but AGM-84’s fired on BOL with activation points a couple miles prior to the vsls did the job. Fireballs from the impacts could be seen from the Flag Bridge from well over the horizon, and the Admiral knew he would feel an enduring shame for what he had just done – if he survived. The probability of survival was increased by his pre-emptive attack, but no inquiry convened in DC would care about that. As with the Submarine LO, he too did his duty. The CVBG was now creeping along into the teeth of the enemy defenses toward the NE. The strike formations were dispatched as an air battle developed to the North. The F-14’s were ordered to kill the Tu-95 Bear-D’s first, then Su-24 Fencer-E’s, with the swarms of MiG-29M Fulcrum-E’s being killed only as required. Without the eyes and EW screen the fighters were no real threat to the CVBG. The enemy Air commander at Kelfavik had put up an interlocking screen which only the AIM-54C could reduce. For an instant the RADM regretted leaving Keflavik for later – his opponent was just too good for his liking. Bear-D’s and Fencer-E’s fell to the sea, along with flights of Fulcrum-E’s that got too close. An 8-ship flight of Tu-22M Backfire-C’s came South over the NE CVHBG. They were in AS-4 Kitchen ASM range of my CVBG and they died under a hail of AIM-9’s and 20mm from F-14’s returning from the Northern skirmish line. Two sections of F-14’s pounced upon a 12-ship flight of Backfire-C’s inside the effective range of the thick GBADS around Keflavik. Ignoring their fuel gauges they rocketed toward the enemy, did their duty and rocketed back towards home – knowing they would never make it all the way. The CAG had seen their antics and the tankers orbiting with the Northern AEW picket were sent further North. The fighter pilots would live to fight again that day. Already there were several aces in the CVW’s and the area between 150-300Nm SE-SW of Iceland was dotted with dozens of funeral pyres of dead fighters, bombers, and support aircraft. Some F-14’s were again sent East to establish a BARCAP about 300NM out along the bearing to the southern UK airfield. These were supported by an E-2C, ES-3, and EA-6B. Once the BARCAP stations were established it became a constant chore to replenish them as the enemy continued throwing everything they had at my forces. It was rare to have more than 2*F-14’s ready on my CV’s for most of the game, as they were either airborne or being made ready for combat. Eventually the back of both bases were broken with the fighter activity dwindling, but that took many hours and much combat. The attack pilots knew about the fighter battle to the North, and they also knew we were winning it. Importantly they knew another thing which the fighter jocks did not – ultimately it would be the VA/VFA’s which won this battle as they sank the enemy forces and demolished his bases. That said, they were happy to have a few F-14’s riding shotgun as each formation neared its’ target BG. The main enemy CVBG received 50% strike capacity, and each of the CVHBG and SAG1 received 25%. In all cases the targeting templates were the same – CV/CVH/BCGN/CG as primary targets. I wanted each surface launched SS-N-12/19 and SA-N-6 to be joining the first four subs on the bottom of the Atlantic. The main strike looped SW, then South, then SE before commencing attack runs to the NE. This took them in towards the enemy CV’s rear and meant more of the AGM-84’s were going to reach their targets. The other two strikes went straight in. Again it was a TOT strike while the enemy surface vessels were observing EMCOM – relying on their AEW helos for raid warning. The first strike to achieve success was the NW group – the SAG1 – with their AGM-84’s killing most of the SAG. A BCGN, 2*Kara CG’s, 2*Udaloy DD’s, and 1* Sovremenny DDG sunk beneath the waves, leaving just 1*Sovremenny (damaged to 50%, and to sink withing 30mins), the decoy CV, and a handful of missile boats. Interestingly one of the strike pilots reported a detection on a Nanuchka IV, armed with the SS-N-26 Yakhont SSM. That weapon was out of range anyway, and the remnants of the SAG were DIW while recovering survivors. I believe their fervor for battle was diluted by the TOT strike I had just delivered. The SE CVBG soon bore the brunt of another superb TOT strike. AGM-84’s again slammed into 1*Kuznetsov CV, 1*Kiev CVH, 1*BCGN, 1*Slava CG, and 1*Azov CG. The targeting template used was perfect, and the CV’s and all SA-N-6 or SS-N-12/19 shooters died under a hail of missiles. There were 2 each Kara and Kresta CG’s, along with 3 each Sovremenny DDG’s and Krivak FF’s remaining. Still, there was reason to believe there was a SS-N-12/19 shooter still in the group, so the S-3B squadrons were rearmed for ASW and prepared for the total destruction of the enemy SAG so they could hunt the likely Oscar class SSGN’s. The final strike met a similar level of success to the first strike. 1*Baku CVH, 1*BCGN, 1*Slava CG, and 2*Sovremenny DDG’s were promptly sunk in another TOT strike. The remnants included 1*CV decoy, 2*Udaloy DD’s and 3*Tarantul III missile boats. Again, there were indications of at least one Oscar SSGN, in this case it was revealed by a timely comms intercept (simulated). The strike pilots were jubilant upon their return, and with good reason: Quantity Sunk Type Class 1 CV Kuznetsov 2 CVH Kiev (Mod) 3 BCGN Kirov 2 CG Slava 1 CG Azov 2 CG Kara 4 (incl damaged vsl which later sank) DDG Sovremenny 2 DD Udaloy STK The SAG’s were again decimated, and would require minimal mopping up at my leisure. I did want to hunt the SAG organic SSGN’s though, since they were still in range of my CVBG. As such, AGM-65’s and AGM-88’s were added to the strike loadouts, along with some decoys to soak up some of the remaining SAM’s. When enough F-14’s could be spared I sent tanker supported sections into the SAM envelope – while high & fast – around Iceland in order to pluck out the deadly 12-ship Tu-22M flights. Any Bear-D’s launched also had a short life once they arrived at their patrol stations. The Fencer-E’s were a constant thorn in my side, significantly degrading radar coverage for much of the game, and soaking up AIM-54C’s. The fact they would separate from their patrol stations around Iceland and head South against my F-14’s sealed their fate. I can’t help but think that they may have stayed in the formation – in SAM coverage from Iceland – If they had not carried their AA-8 Aphid WVRAAM’s. Obviously even Russian ECM operators/pilots wanted to paint a US star on the side of their aircraft. It was not to be, though. {Note: I have yet to get around to making the “unarmed” loadout with just ECM equipment to determine if these aircraft continue to separate from the formation when lacking weapons suitable for the detected enemy forces – in this case aircraft}. The SAG remnants were erased and the S-3B’s moved in quickly, laying hundreds of sonobuoys. They were rewarded with 2-5 sub detections per group, with all detected subs sunk. To the NW it was a group of 5*SSN’s: 1*Sierra I, 2*Victor-III, 2*Victor-II. To the SE it was just 2 submarines, but their unit value made up for the limited numbers: Oscar-I SSGN K-525 Arkhangelsk and 1*Imp. Akula-I SSN. To the NE there was a mixed bag of 4 submarines: Oscar-II SSGN K-132 Irkutsk, 1*Charlie-II SSGN, and 2*Victor-III SSN’s. The ASW crews were beyond jubilant upon their return, also with good reason: Quantity Sunk Type Class 1 SSGN Oscar-II 1 SSGN Oscar-I 1 SSGN Charlie-II 1 SSN Imp Akula-I 1 SSN Sierra-I 4 SSN Victor-III 2 SSN Victor-II Another SAG was detected to the NE, with no supporting air assets. It was tracking NE at approx 19kts. ESM and comms intercepts confirmed the presence of another BCGN. The strike crews were informed of the new targets and loaded up with AGM-84/88, and TALD’s, to soak up some SA-N-6’s. The strike was launched and the escorting F-14’s fought off the swarms of Su-35 Flanker-E’s (nice aircraft, though I have doubts about the AA-12 Adder (mod) missile range figures) which seemed to originate from the northern UK airfield. The strike pilots were well disciplined and concentrated their fire on the BCGN, sinking the Frunze. Another submarine wolfpack was detected from an escorting submarine to the NNE, and S-3B’s were soon sent to investigate. An Alfa SSN was the first to die, along with a Victor-III SSN and the real prize – 2*Oscar-II SSGN’s, the K-530 Belgorod and K-148 Orenburg. An additional SAG was detected – SAG3 – but this was based on a Kara CG, and lacked any potent SSM’s or SAM’s. As such it was picked apart at leisure as strike pilots came out of crew rest. The remainder of SAG2 was also killed – interestingly with the FFL Scorpio joining the Frunze at the bottom of the north Atlantic. The back of the fighter regiments at both Iceland and the southern UK base were now broken. It was time to take out the nearest base – Keflavik. It had Tu-22M’s rather than Tu-16’s, too. A-6E’s and F/A-18C’s were rearmed with decoys, HARM’s, SLAM’s, Mavericks, and Walleye’s – while the bomber squadrons were placed in a holding pattern to the west of Iceland. The plan was to saturate the SA-5C, SA-20C, and SA-12 batteries with decoys, send in SLAM’s to surgically remove the most potent SAM’s, and HARM anything with a radar. After that the strike B-1B’s and B-2A’s would have an easy time getting into range of Keflavik and demolishing it with PGM’s. Again that is how it went. The base was destroyed and the supporting SAM clusters were knocked out. I also killed two SA-6 SAM barges which went active too early. Breaking through the interlocking SAM belts was no small task, and I was glad to have the “Heavies” along to do the mud churning. Another wolfpack was detected by a supporting SSN almost directly north. Again S-3B’s investigated and killed 3*Echo-II SSGN (mod), 1*Echo-II SSGN, 1*Victor-I SSN and 2*Kilo (877) SSK’s. It turns out there were separate groups all in close proximity. Once in range I repeated the cycle with the southern UK airfield, leaving it a smoking wreck. In this case there was just one major SAM concentration protecting RAF Kinloss, and again the most potent threats were surgically removed with SLAM’s after decoys and HARM’s had dealt with the ready launch SAM rounds. Again, Walleye’s demolished the base and the few remaining SAM batteries. Minimum victory was awarded here, but I saw the light at the end of the tunnel and again the strike pilots were pressed into another major series of attacks in just hours. A third submarine wolfpack was detected from an escorting submarine to the ENE, and S-3B’s were soon sent to investigate – having more than earned their place in the CVW. Another Alfa SSN was the first to die, along with another Victor-III SSN and the real threat – 1*Oscar-I SSGN, the K-206 Murmansk. To end the campaign, the RADM decided to trial the T-LAM, after reloading the strike planes with decoys. They were sent in advance with ECM support to flood the defenses as the T-LAM’s came in VLow. Success! Lerwick was demolished – and with it TOTAL VICTORY was awarded. This was another great scenario, with constant activity until the end – with even greater intensity than V1.0. The Su-35 Flanker-E was a major threat and they appeared at just the wrong times throughout the scenario. Thanks Ralf for a great scenario. As mentioned, I may well try to get back into scenario design, using some of the tips you posted in the V1.1 thread. Live Well. Kindest Regards, trader
-
AAR: F-14 Fleet Defender Battleset: EC2003 NACV Source: http://harpgamer.com/harpforum/index.php?showtopic=2465 Author: Ralf Koelbach Contact: rkoelbach@yahoo.com Date of release: 30-Dec-2007 Date of play: Late June 2008 Ladies and Gentlemen, I've finally reached total victory in the above scenario (http://harpgamer.com/harpforum/index.php?showtopic=2465). Now, I am moving on to V1.1, but I wanted to try and write up my first AAR before I get to into that scenario. At game start time I found my sole asset for this scenario - a 2*CV CVBG - about 500NM directly south of Iceland. I had a strong suspicion that there would be Backfires, or at least Badgers based there, and sent out 2-ship sections of F-14’s at full military power at high altitude covering the 90 degree arc NW-NE. E-2C’s were sent up to patrol stations around the formation – along with ES-3’s and EA-6B’s - and promptly reported enemy KA-31 AEW Helix helicopters to the West, NE, and SE. As the positions of the AEW helos were nailed down by cross-bearing ESM cuts at distances of between 200NM-350NM from the centre of my formation, I seemed to have the enemy surrounded. If they were all CVBG’s, I was going to struggle – since those 48*F-14’s were on their own to defend my CVBG. I am used to AIM-120 carrying F/A-18’s and it was a major surprise when I realized these hornets carried only AIM-7’s for BVR combat. If the enemy was uncoordinated and sent unescorted bombers or Recon/ECM aircraft they could have contributed, but throughout the battle enemy coordination was very effective – and without plentiful stocks of the AIM-54C I would have suffered crippling fighter losses, followed by devastating ASM/SSM strikes. That was the question, though. At least one – and likely two – of these groups would have to be based on a CVH, rather than a CV and its’ main aircraft would then be the Forger – irrelevant. It was entirely possible that some of the CV’s were in fact decoys. Only one way to know, and I went active on all airborne search sensors. No ship based radar was activated since elements of my CVBG were in SS-N-12/19 range of each enemy SAG/CVBG, and a 8*ship of Tu-22M’s which were heading South over the NE SAG. The answer was soon delivered as the first sweeps of the E-2C’s painted heavy fighter activity and the largest concentration of large surface craft to the SE. More F-14’s were rapidly sent to take down the CAP of what was now obviously the main enemy force. Minimal detections were made to the West, and medium activity to the NE. That determined the allocation of fighers, in addition to the BARCAP I attempted to throw up across the bearing to each main airfield. EA-6B’s set about jamming anything with a Red Star, and succeeded. Another change as a result of the enemy SAG’s was the targeting priority for the northerly F-14 sections, from bombers to Recon planes. If a Bear-D got even a sniff of my CVBG I was going to suffer an immediate attack from at least 4 directions (the closest airfield which already had a patrolling flight of Tu-22M Backfire-C’s, plus the 3 SAG’s), and likely 5-6 directions since I had to assume there were Oscar SSGN’s outside of the SAG’s but within missile range also. Secondary targeting priority went to the Fencer-E’s which were putting up a very effective ECM barrier through which I could not see. First blood went to the F-14, with all the Su-33 Flanker-D’s on CAP to the SE being splashed without loss, along with about a dozen Forgers. There were two Carrier-like returns and the aircraft composition encountered would indicate that it was a Russian Kuznetsov CV and a Kiev CVH. Two strike groups were launched with F/A-18’s, A-6E’s and EA-6B’s – all armed for ASUW or ECM. In flight they formed into one massive strike group and proceeded SSE, before turning in for the attack from the SW of the confirmed enemy CVBG. At this time the enemy group still had surface based radars off so exact identification was not possible, but I could tell carriers from surface combatants and I knew the two carrriers were real rather than decoys based on the air activity. In total 50% of my strike capacity was sent after this group. I also launched strikes on the other two enemy SAG’s, even though exact composition was not known. For all strikes the targeting priority was either CV/CVH’s or BCGN/CG’s – anything with a fixed-wing aircraft or SA-N-6 Grumble or SS-N-12/19 SSM. Each group had at least the last two, and I now assessed that the Westerly group CV was a decoy, along with one CV from the NE group. Light Forger activity was dealt with easily from this last SAG, but its’ sheer presence complicated my BARCAP allocations to the North. Each of these secondary groups got 25% of my strike capacity. To the North Tu-95 Bear-D’s, Su-24 Fencer-E’s, and MiG-29 Fulcrum-E’s were knocked from the sky, along with the 8-ship of Tu-22M’s as they cleared the enemy SAG to the North. Some Bear-D’s got close to detection range, but the EA-6B’s were on the task, and their Big Bulge radars had a low detection probability anyway. Some F-14’s were also sent East to establish a BARCAP about 300NM out along the bearing to the UK airfield. These were supported by an E-2C, ES-3, and EA-6B. Once the BARCAP stations were established it became a constant chore to replenish them as the enemy continued throwing everything they had at my forces. It was rare to have more than 2*F-14’s ready on my CV’s for most of the game, as they were either airborne or being made ready for combat. Eventually the back of both bases were broken with the fighter activity dwindling, but that took many hours and much combat. The first strike to achieve success was the Westerly group, with their AGM-84’s killing most of the SAG. A BCGN, 2*Kara CG’s, 2*Udaloy DD’s, and 1* Sovremenny DDG sunk beneath the waves, leaving just 1*Sovremenny, the decoy CV, and a handful of missile boats. Interestingly one of the strike pilots reported a detection on a Nanuchka IV, armed with the SS-N-26 Yakhont. That weapon was out of range anyway, and the remnants of the SAG were DIW while recovering survivors. I believe their fervor for battle was diluted by the TOT strike I had just delivered. The SE CVBG soon bore the brunt of another superb TOT strike. AGM-84’s slammed into 1*Kuznetsov CV, 1*Kiev, 1*BCGN, 1*Slava CG, and 1*Azov CG. The targeting template used was perfect, and the CV’s and all SA-N-6 or SS-N-12/19 shooters died under a hail of missiles. There were 2 each Kara and Kresta CG’s, along with 3 each Sovremenny DDG’s and Krivak FF’s. Still, there was reason to believe there was a SS-N-12/19 shooter still in the group, so the S-3B squadrons were rearmed for ASW and prepared for the total destruction of the enemy SAG so they could hunt the likely Oscar class SSGN’s. The final strike met a similar level of success to the first strike. 1*Kiev CVH, 1*CV decoy, 1*BCGN, 1*Slava CG, and 2*Sovremenny DDG’s were promptly sunk in another TOT strike. The remnants included 2*Udaloy DD’s and 3*Tarantul III missile boats. Again, there were indications of at least one Oscar SSGN, in this case it was revealed by a timely KeyHole Satellite pass. The strike pilots were jubilant upon their return, and with good reason: Quantity Sunk Type Class 1 CV Kuznetsov 2 CVH Kiev (Mod) 3 BCGN Kirov 2 CG Slava 1 CG Azov 2 CG Kara 3 DDG Sovremenny 2 DD Udaloy STK 1 CV CV Decoy The SAG’s were decimated, and would require minimal mopping up at my leisure. I did want to hunt the SAG organic SSGN’s though, since they were still in range of my CVBG. As such, AGM-65’s and AGM-88’s were added to the strike loadouts, along with some decoys to soak up some of the remaining SAM’s. When enough F-14’s could be spared I sent tanker supported sections into the SAM envelope – while high & fast – around Iceland in order to pluck out the deadly 12-ship Tu-22M flights. Any Bear-D’s launched also had a short life once they arrived at their patrol stations. The Fencer-E’s were a constant thorn in my side, significantly degrading radar coverage for much of the game, and soaking up AIM-54C’s. The fact they would separate from their patrol stations around Iceland and head South against my F-14’s sealed their fate. I can’t help but think that they may have stayed in the formation – in SAM coverage from Iceland – If they had not carried their AA-8 Aphid WVRAAM’s. Obviously even Russian ECM operators/pilots wanted to paint a US flag on the side of their aircraft. It was not to be, though. {Note: I may well see about making an “unarmed” loadout with just ECM equipment to determine if these aircraft continue to separate from the formation when lacking weapons suitable for the detected enemy forces – in this case aircraft} The SAG remnants were erased and the S-3B’s moved in quickly, laying hundreds of sonobuoys. They were rewarded with 3-5 sub detections per group, with all detected subs sunk: The ASW crews were beyond jubilant upon their return, also with good reason: Quantity Sunk Type Class 1 SSGN Oscar-II 1 SSGN Oscar-I 1 SSGN Charlie-II 1 SSN Imp Akula-I 1 SSN Sierra-I 4 SSN Victor-III 2 SSN Victor-II Now, for the bases. Keflavik was priority 1 as it had Tu-22M’s rather than Tu-16’s. F/A-18’s and A-6E’s were rearmed with decoys, HARM’s, SLAM’s, Mavericks, and Walleye’s. The plan was to saturate the SA-5C and SA-20C batteries with decoys, send in SLAM’s to surgically remove the most potent SAM’s, and HARM anything with a radar. After that the strike A-6E’s would have an easy time getting into range of Keflavik and demolishing it with Walleye’s. And that is how it went. The base was destroyed and the supporting SAM clusters were knocked out. I later killed two SA-6 SAM barges which were placed too far to the East. Had they been SA-10 SAM barges and had their fire discipline been good, many of my strike pilots would not have come home. Minimum victory was awarded here, but I saw the light at the end of the tunnel and again the strike pilots were pressed into their third major series of attacks in just hours. After enough time to rearm the cycle was repeated to the East, this time with S-3B’s assisting with buddy-refuelling stores for the extended range strike. The A-6E’s were almost bingo over the target, without having looked at a tanker since departing the boat. In this case there was just one major SAM concentration protecting RAF Kinloss, and again the most potent threats were surgically removed with SLAM’s after decoys and HARM’s had dealt with the ready launch SAM rounds. Again, Walleye’s demolished the base and the few remaining SAM batteries. Total victory was awarded a short time later, with the following tally: Type Number Carriers 5 Ships 38 Submarines 18 (some seemed to be counted/reported as sunk 2 or even 3 times) Aircraft 381 Helicopters 90-odd Bases 2 AD Mobile 19 This was a great scenario, with constant activity until the end. I am looking forward to playing V1.1 next. Thanks Ralf for a great scenario. I may well try to get back into scenario design, using some of the tips you posted in the V1.1 thread. Live Well. Kindest Regards, trader
-
Greetings Gentlemen, I've just had a most interesting time playing the subject scenario. To Ralf, that was awesome. version 1.0 was also. I'll try to write up some AAR's when I replay the scenarios. However, toward the end of V1.1 - well it was far from the end but the balance was tipping - I had a most unusual thing happen. I had been lucky and avoided getting painted by any Bear-D, Fencer-E or Badger-D's. Thus the red SSM's had stayed in their silos and most were at the bottom of the Atlantic after 3 sneak attacks at the beginning took out anything the size of a Slava or bigger in the three closest enemy SAG's. I'd also killed an Oscar which gave itself away by going too fast in the remnants of the main enemy CVBG. HOWEVER, I received word that my CVBG was getting detected, "and did I want to turn on the radars?". I checked all around and there was nothing within detection range - EXCEPT for a neutral merchant vessel. Next report was Series 65-76's from the south and SS-N-19's from the remnants of the northern SAG - obviously another Oscar! The 12-ship of Backfires departed their patrol station around Iceland and commenced an attack run on my CVBG. This would have all been fine, BUT my (mis)understanding was that neutrals do not report to either red or blue. For this scenario that was not the case. Any clues? Live Well. Kindest Regards, trader_26 BTW, that Su-35 Flanker-E is a piece of work - makes me wish for a real Phoenix replacement, or NATF.


